
Effects Management
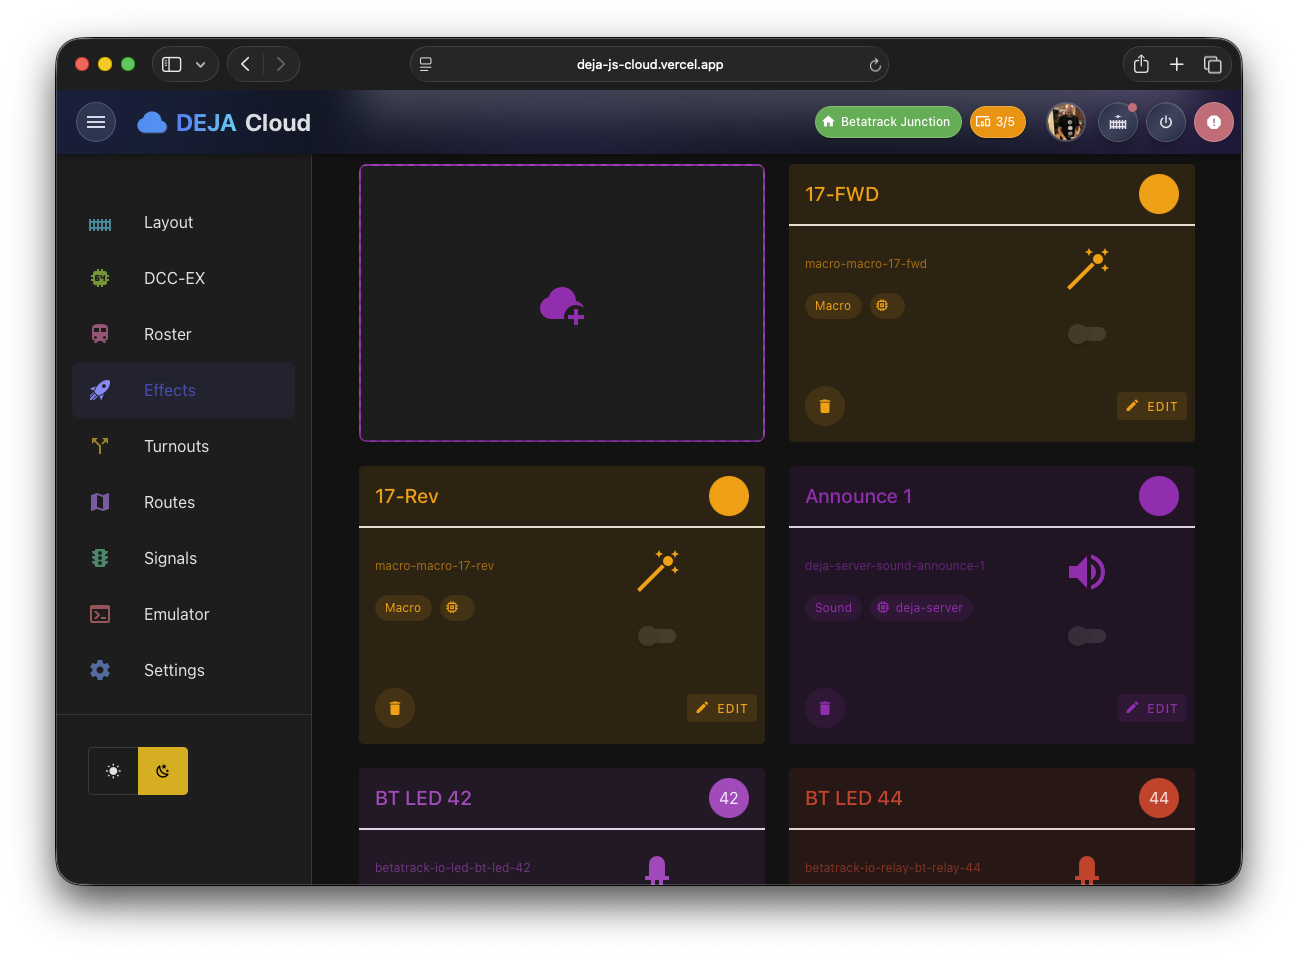
The Effects section lets you define pin-toggle effects for your layout -- lights, LEDs, street lights, relays, frog juicers, power switches, and generic pins. Each effect is tied to a hardware device and pin, and can be triggered from the Throttle app, the Tour app, or through route and sensor automation.
🔊 Looking for sound playback? Manage your audio files and play them on the layout from the Sounds page. Looking for addressable LED strips? WLED scenes are configured per-device on the Devices page.
Effects List
The main effects view (/effects) shows your effects in a card grid. The toolbar provides:
- List Menu -- Options for filtering and display.
- Sort -- Opens a drag-and-drop sorter dialog where you can reorder effects by dragging them into position, then saving the new order.
An "Add" tile at the beginning of the grid lets you create new effects.
Effect Types
DEJA.js supports seven effect types, all pin toggles designed for a specific hardware use case:
| Type | Icon | Description | Requires |
|---|---|---|---|
| Light | Lightbulb | Standard on/off light output | Device, pin |
| LED | LED | Single LED output | Device, pin |
| Street Light | Post Lamp | Street lamp or area lighting | Device, pin |
| Relay | Electric Switch | Relay module control for switching power circuits | Device, pin |
| Frog Juicer | Blender | Automatic frog polarity switching for turnouts | Device, pin |
| Power | Power | Power control output | Device, pin |
| PIN | Pin | Generic digital output pin | Device, pin |
Every effect type requires a device and a pin -- there's no variation in the form fields between types beyond the icon and label.
Creating an Effect
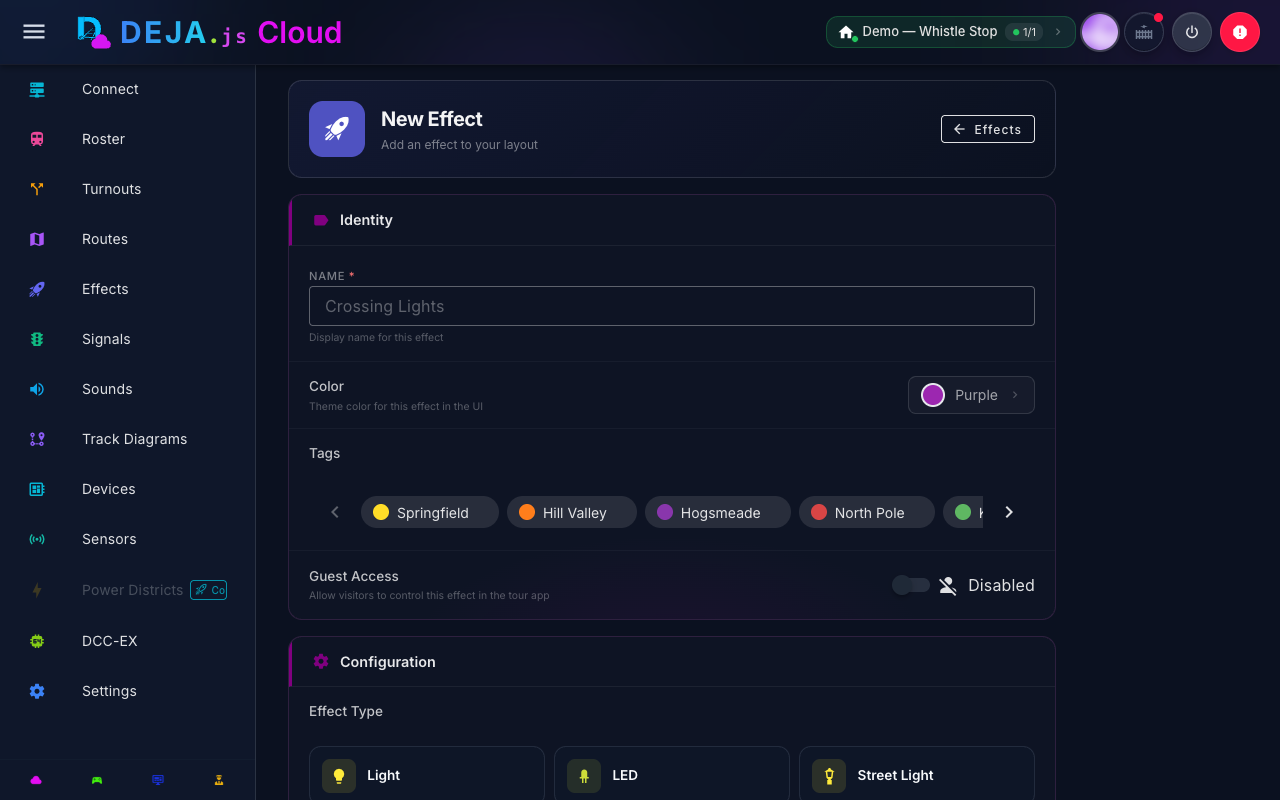
Navigate to /effects/new or click the Add tile. The effect form adapts dynamically based on the selected type.
Step 1: Select a Device
A device selector appears showing all devices registered in your layout as large toggle buttons. Select the device that controls this effect.
Step 2: Select the Effect Type
A type selector displays all seven effect types as large buttons with icons and labels. Click the type that matches your hardware setup. Once selected, the type cannot be changed for an existing effect (only shown when creating new effects).
Step 3: Configure Fields
After selecting a type, the form displays the relevant fields:
| Field | Description |
|---|---|
| Name | A display name for the effect |
| Pin | The output pin number on the connected device (Arduino, ESP32, or Pico W) |
Display and Access Options
All effect types share these additional settings:
- Color -- Pick a display color from the color picker dialog.
- Tags -- Assign tags for filtering and organization.
- Guest Access -- A toggle switch to mark the effect for public/guest display in the Tour app. Tour still requires visitors to sign in — this doesn't bypass authentication, it controls which effects are surfaced there versus kept Cloud/Throttle-only. The label dynamically shows "Enabled" or "Disabled" with a corresponding icon.
Click Submit to save the effect, or Close to discard changes.
Editing an Effect
Click any effect card in the list to navigate to /effects/:effectId. The edit form shows all the same fields, pre-populated with the existing configuration. The effect type is locked and displayed as a chip at the top of the form. Modify fields and click Submit to save.
Sorting Effects
Click the sort button in the toolbar to open the Sort Effects dialog. Drag and drop effect tiles to reorder them, then click Save to persist the new sort order across all apps.
Related Pages
- Sounds -- Upload and play back audio from the sound library.
- Devices -- Assign effects to registered devices and configure WLED scenes.
- Turnouts Configuration -- Link effects to turnout actions.
- Signals Configuration -- Configure signal heads, which are similar to multi-pin effects.
- Layout Configuration -- Manage the devices that host your effects.