
Sensors
Sensors provide real-time detection of train presence, turnout positions, and other physical events on your layout. Sensor data is used to trigger automated effects and update signal aspects.
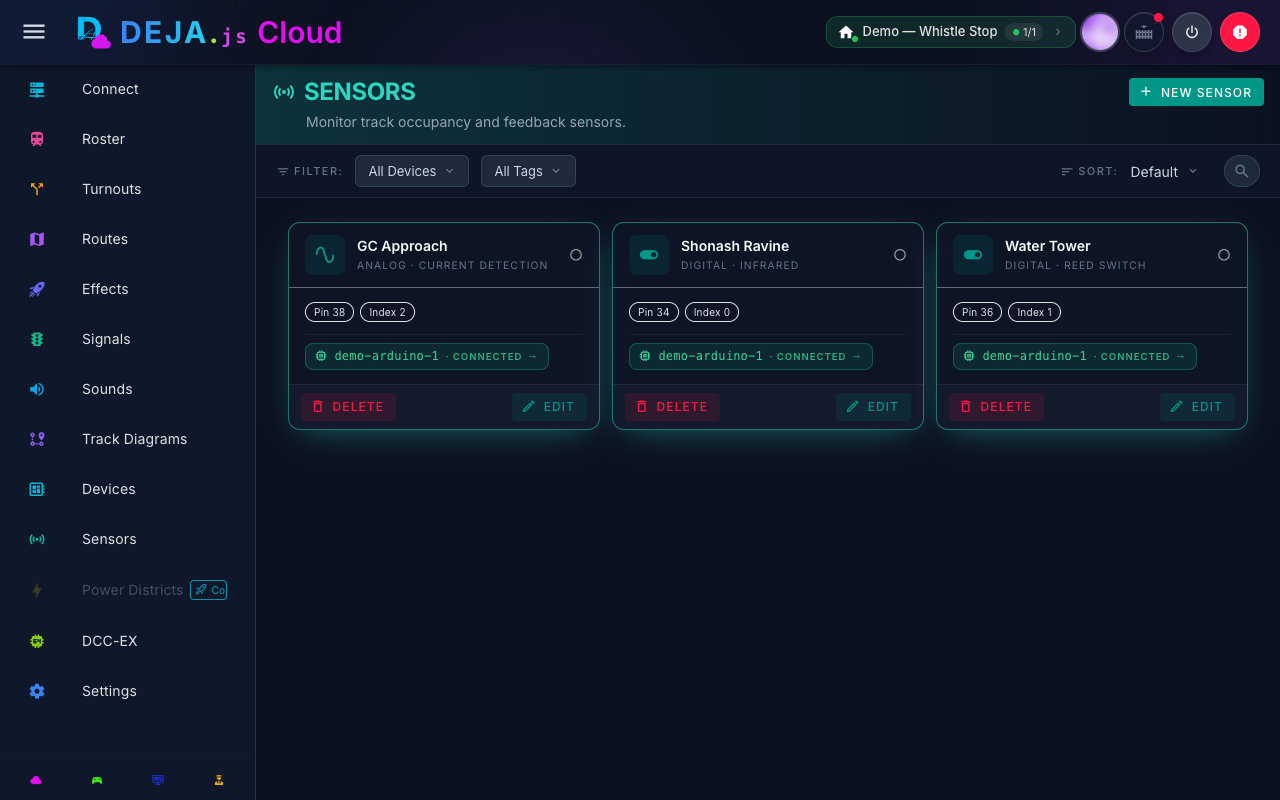
How Sensors Work
Sensors are hardware inputs (typically analog or digital pins on Arduino, ESP32, or Pico W devices) that detect physical changes on the layout. Common sensor types include:
- Infrared detectors -- Detect train presence in a block by breaking an IR beam.
- Current sensors -- Detect power draw on a section of track, indicating occupancy.
- Reed switches -- Activated by magnets mounted under rolling stock.
- Optical sensors -- Detect passing trains using light sensors.
Sensor-to-Effect Automation
The primary automation feature of sensors is their ability to trigger effects. Each sensor can be linked to an effect. When the sensor's state changes, the linked effect automatically updates to match.
This creates an end-to-end automation chain: a train passes a sensor, the sensor activates, the linked effect triggers (for example, turning on a crossing signal), and the effect runs until the sensor deactivates.
Example: Block Occupancy Signal
- Configure an IR sensor on an Arduino board connected to pin A4.
- Add the sensor from the Sensors screen (
/sensors) and link it to a signal effect. - When a train enters the block, the sensor activates.
- The linked signal effect activates too, which changes the signal aspect to red.
- When the train exits, the sensor deactivates, and the signal returns to green.
Automations
A sensor's direct link can only drive a single effect. For anything more involved, create an Automation (/sensors/automations) and link the sensor to it instead. An automation fires a sequence of actions when its sensor activates, deactivates, or either:
| Action Type | Icon | Description |
|---|---|---|
| Effect | Rocket | Turns a pin-toggle effect on or off |
| Turnout | Split | Sets a turnout to thrown or closed |
| Signal | Traffic light | Sets a signal's aspect (red, yellow, green) |
| Route | Map | Runs a route, throwing every turnout it references |
| Throttle | Speedometer | Sets a throttle's speed and direction |
Each automation also supports an optional delay (milliseconds to wait before running its actions) and can be individually enabled/disabled without deleting it. Actions in an automation run sequentially, in the order they're listed.
Real-Time Monitoring
The Sensors screen (/sensors) lists your sensors and displays their data in real time. As sensor states change on the layout, the UI updates immediately. This makes it easy to verify that sensors are working correctly during installation and testing. Add sensors here, and build sensor-triggered rules from the Automations view (/sensors/automations).
When viewing a device's details page (/devices/:deviceId), you can see which sensors are assigned to that device alongside its turnouts and effects.
Sensor Tips
- Debouncing -- Hardware sensors can produce noisy signals, especially current sensors. Implement debouncing in your device firmware to avoid rapid state toggling.
- Pin placement -- For IR sensors, position the emitter and detector on opposite sides of the track, below rail height, to reliably detect all rolling stock.
- Testing -- Use the Cloud app's real-time sensor display to verify sensor wiring before linking effects. Watch the sensor state change as you manually trigger the sensor.
- Need more than one action? -- A sensor's direct link only drives a single effect. To respond to one sensor with several outputs (effects, turnouts, signals, a route, or a throttle change), create an Automation and link the sensor to it instead.
Related Pages
- Effects Management -- Create the effects that sensors trigger.
- Signals Configuration -- Use sensors to automate signal aspects.
- Layout Configuration -- Register the devices that host your sensors.